Zapier integration
Create your own notification workflows triggered by our webhooks
Overview
The Codat Zapier app exposes all of the Codat webhooks as triggers. This means you can start building workflows on top of Codat without writing a line of code.
Some simple use cases might include:
- Posting a message on Slack or via email whenever a new CompanyCompany In Codat, a company represents your customer's business entity. Companies can have multiple connections to different data sources. has shared data.
- Posting a message when syncSync The process of fetching the latest data from a connected data source. Syncs can be triggered manually or run automatically on a schedule. errors occur.
- Adding companies that you onboard to a spreadsheet automatically.
What is Zapier?
Zapier provides no-code workflows that let you connect Codat to more than 2,000 other web applications. These automated connectionsConnection A link between a Codat company and a data source (like an accounting platform). Each connection represents authorized access to pull or push data from that platform. are called Zaps. You can set them up in minutes with no coding to automate your day-to-day tasks and build workflows between apps that otherwise wouldn't be possible.
Each Zap consists of two parts: a trigger that determines the starting condition of the workflow (If X happens in Source A...) and an action that happens in another app as a result (...do Y in Target B).
With our Zapier app, you can use our webhookWebhook An automated notification sent from Codat to your application when specific events occur, such as when data syncs complete or connections change status. events as triggers and drive actions in all of the tools you use - from Google Sheets to SalesForce.
You can learn more about Zaps in Zapier's own documentation.
Prerequisites
To build your own workflows, you need:
- A Zapier account that you can create one for free.
- Admin or Developer access to your Codat instance.
Create your workflow
Go to Zapier and follow the steps below to create your own workflow.
Set up the trigger
-
In Zapier, select Create > Zaps to start a new Zap and give it an appropriate name.
-
Click Trigger to select an event that starts your Zap, search for Codat and click the tile to select.
-
Choose the Receive WebhookWebhook An automated notification sent from Codat to your application when specific events occur, such as when data syncs complete or connections change status. Messages trigger from the Event dropdown.
-
Click Continue, then Sign in and connect to Codat using your Client ID and Zapier integration key.
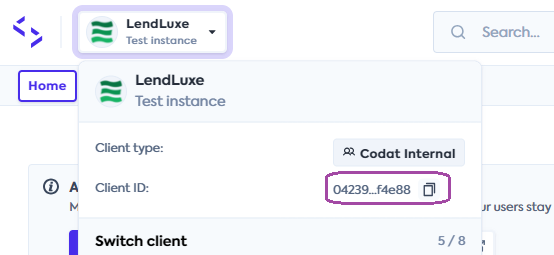
To copy your Client ID, use the client selection dropdown in the Codat Portal.
To get your Zapier integration key: - Grab your authorization header from Developers > APIAPI A set of rules and protocols that allows different software applications to communicate with each other. Codat provides APIs for accessing financial data from accounting, banking, and commerce platforms. keys in the Codat Portal. You can use an existing APIAPI A set of rules and protocols that allows different software applications to communicate with each other. Codat provides APIs for accessing financial data from accounting, banking, and commerce platforms. key or create a new one specifically for this integration. - Using our Rotate Zapier key endpoint, paste the authorization header into the Authorization field and press Send APIAPI A set of rules and protocols that allows different software applications to communicate with each other. Codat provides APIs for accessing financial data from accounting, banking, and commerce platforms. Request. - Use the key returned in the response body as your Zapier integration key.
For each Codat instance, you can only have one live Zapier integration key. Generating a new key invalidates the previous one. To overcome this, you can: - Have a single user manage your Zapier integration. - Add your key to a secure password storage provider and share the key in your team.
-
Choose the webhookWebhook An automated notification sent from Codat to your application when specific events occur, such as when data syncs complete or connections change status. event type you want to trigger the workflow and click Continue.
-
Test the trigger and click Continue with selected record once the test is successful.
If you see that no messages exist in Codat matching the event type, you may need to create some test events first. You can skip this for now and return to this step later once you've fired some corresponding webhookWebhook An automated notification sent from Codat to your application when specific events occur, such as when data syncs complete or connections change status. events. See Troubleshooting for more.
Set up the action
Click Action to select an event that Zap performs after the workflow starts. While Zapier offers hundreds of actions, we suggest starting with their email or Slack messaging services.
Templates
You can use an existing template to save time.
Email notification
- In the action selection pop-up, search for Email by Zapier and click the tile to select.
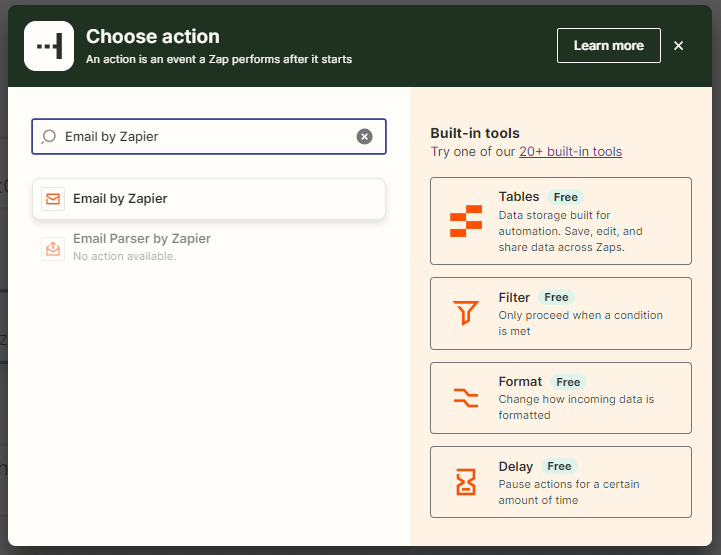
- Choose the Send Outbound Email action from the Event dropdown and click Continue.

-
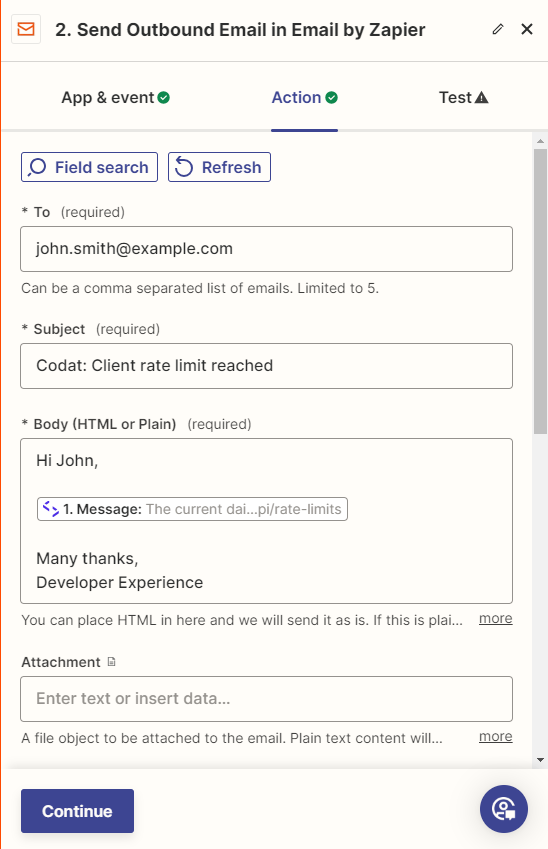
Enter the action details, including the email address for the notifications and the subject and body of the email. Click Continue.
-
Finally, test and publish your Zap.
Slack message
Zapier's Slack integration provides numerous ways of communicating with Slack. In this example, we chose to set up a Zap that sends a message to a specified channel.
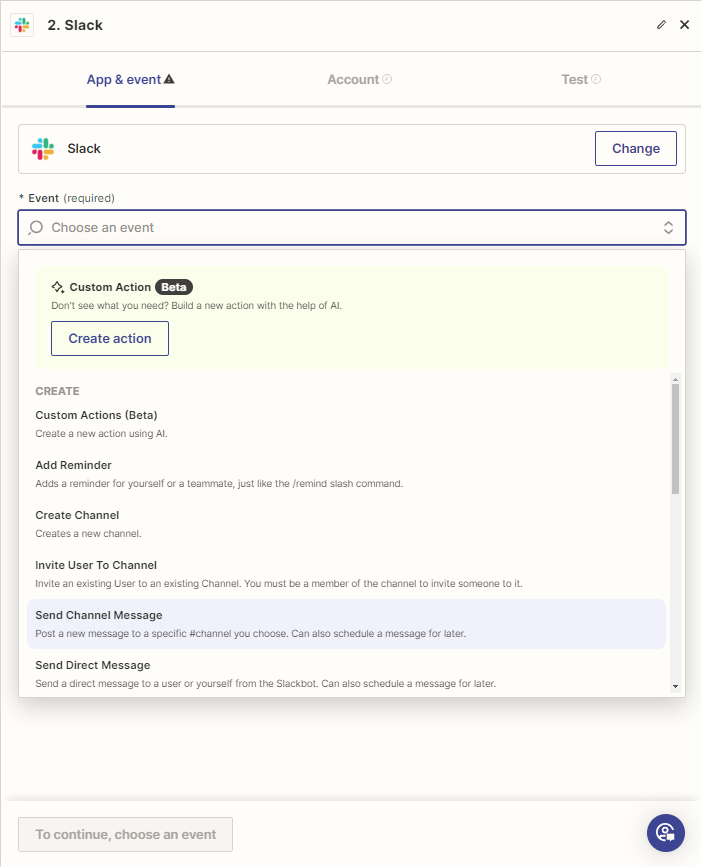
- In the action selection pop-up, search for Slack and click the tile to select.
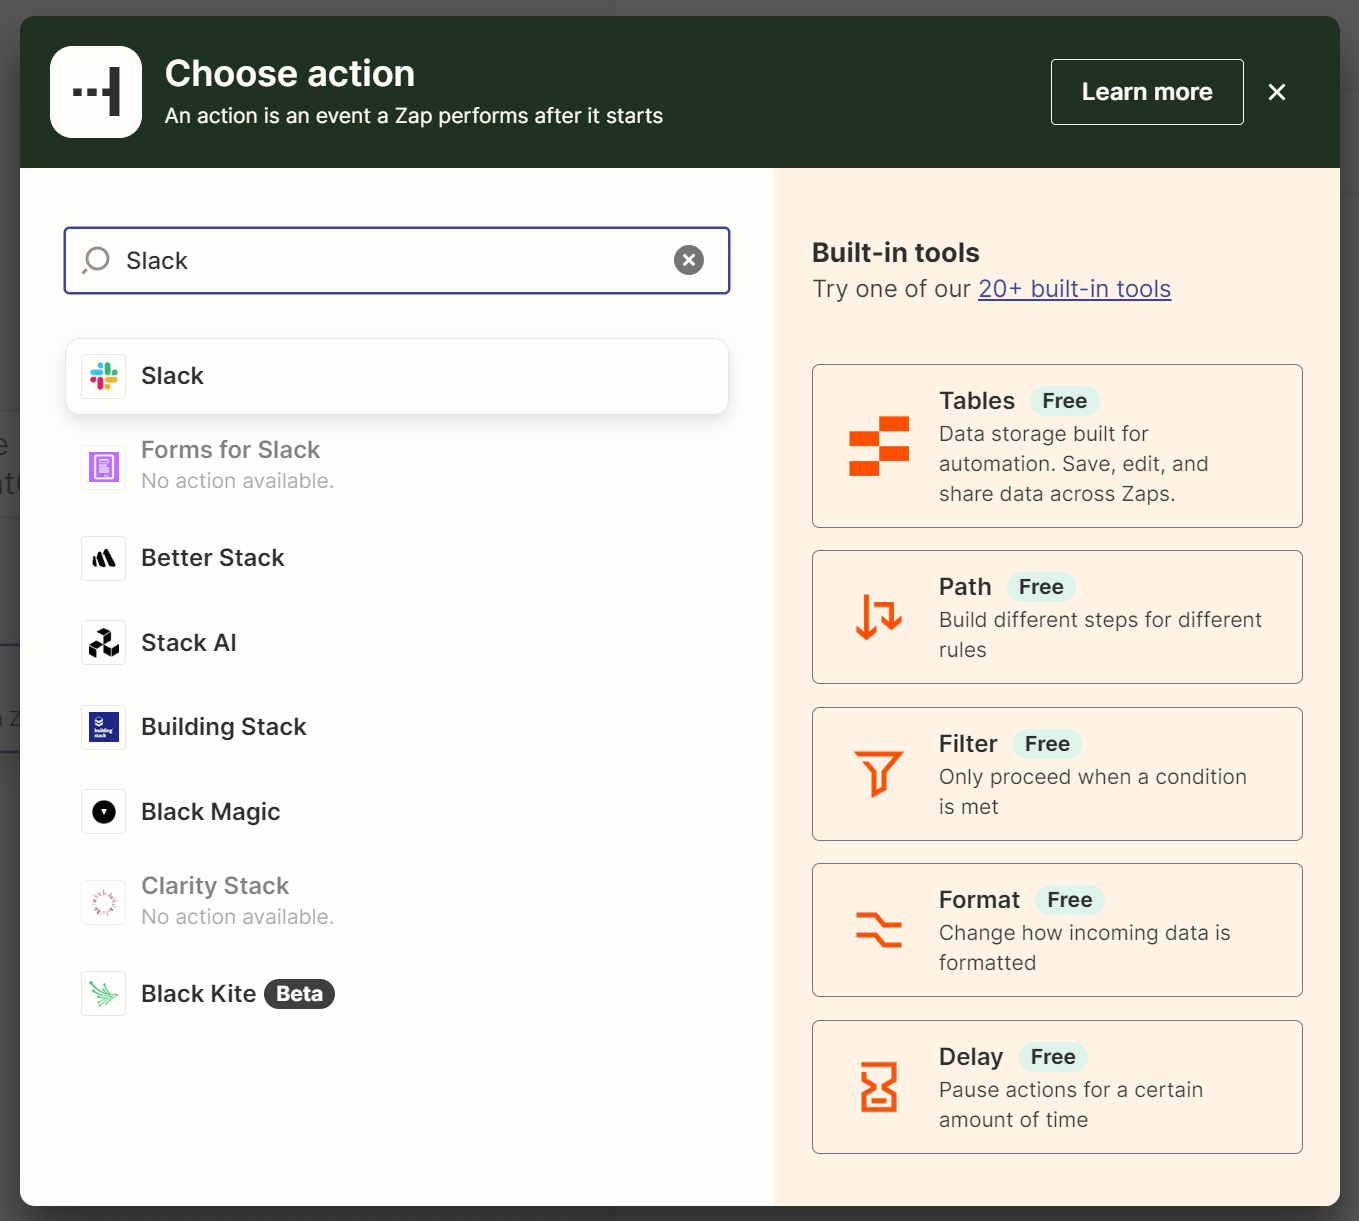
- Choose the Send channel message action from the Event dropdown and click Continue. Alternatively, choose an action that is relevant for your use case.
If this is your first time using Slack, you will be asked to authenticate your account. Once ready, click Continue.
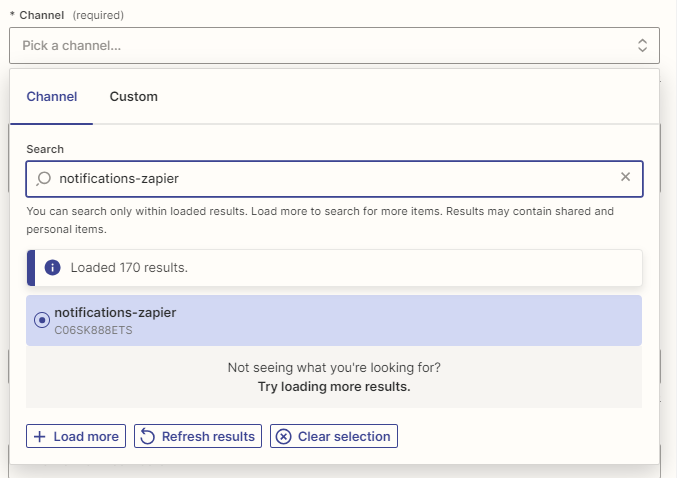
- Search for the channel you want to receive the message and select it.
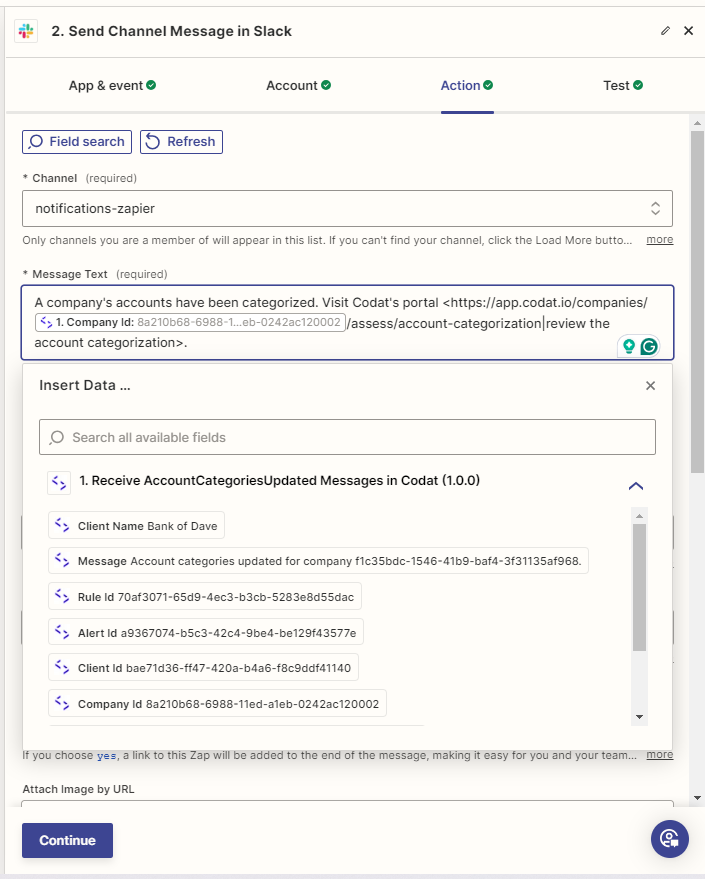
- Create the message text that the channel should receive. Click Continue.
- Finally, test and publish your Zap.

Troubleshooting
If you are using our webhooksWebhook An automated notification sent from Codat to your application when specific events occur, such as when data syncs complete or connections change status. service for the first time, you may not be able to test your trigger at creation. This is because Zapier tests the trigger by checking if messages exist in Codat for your chosen event type, and it will only pick up relevant events once the trigger has been set up for the first time.
For example, if you're using the NewCompanySynchronized as a trigger, you'd have to have set up the trigger and then have a new companyCompany In Codat, a company represents your customer's business entity. Companies can have multiple connections to different data sources. syncSync The process of fetching the latest data from a connected data source. Syncs can be triggered manually or run automatically on a schedule. happen.
To perform the test, build and publish your workflow first. Zapier will generate a new webhookWebhook An automated notification sent from Codat to your application when specific events occur, such as when data syncs complete or connections change status. consumer in Codat, including a description of the event type to which the trigger subscribes. Follow our testing instructions to test the Zapier webhookWebhook An automated notification sent from Codat to your application when specific events occur, such as when data syncs complete or connections change status. consumer.
Alternatively, you can wait for a Codat solution or service to trigger your Zap.